Calibrating a Scanned Map
Before a scanned map can be displayed in the correct location, it needs to be calibrated (geo-referenced). This process involves specifying the location of two known points on the map. Once the correct geographic coordinates are known for these points (called Calibration Points), ExpertGPS can calculate the coordinates of every other point on the map.
Your map must meet the following requirements:
- The map must be in JPEG, TIFF, PNG, or BMP format.
- The map must be oriented so that North is up. If the North arrow is more than 45 degrees from vertical, you will need to rotate the map before proceeding.
- You need to know the projection used to create the map. This information is usually printed at the bottom or in the margin of the map.
Tips
- For maps that only cover a small area (your town, e.g), you may get reasonable results without knowing the projection used when the map was created. Use the default Mercator projection. This method relies on the fact that the Earth is pretty much flat when you're only considering an area of a few square miles.
- The calibration process will be easier if you create a GPX file containing waypoints and a track or two from the area shown on the map. When your uncalibrated map is first displayed, ExpertGPS will position it so that the current GPX file fits nicely on top of the map. If the current file contains data from the area shown on the map, you will be able to verify that you have calibrated the map correctly, because your data will line up with the corresponding features on the map.
- If you don't have GPS data for the location where the map should be, you can zoom the map to that area and use the Extract Map Features from OpenStreetMap command to display all of the roads, trails, and other map features for the area. You can then calibrate the scanned map by dragging roads, trail intersections or other landmarks to their corresponding location on the map.
Adding a New Scanned Map
Before you can use your map in ExpertGPS, it must be added to the Map Library and calibrated.
To add a new map to the Scanned Map Library, click on the , under .
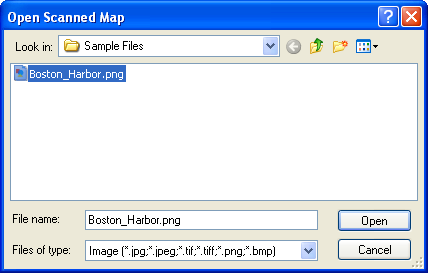
The Open Scanned Map dialog will appear. Select a JPEG, TIFF, PNG, or Bitmap image of your map.
The Edit Scanned Map Dialog
In the Edit Scanned Map dialog, enter a descriptive name for your map, and specify the projection information located on the collar of your map. If your scanned map came with a calibration file (worldfile or map calibration file), it will automatically be detected and used. Otherwise, you will need to manually calibrate the map so that your GPS data appears correctly on it.
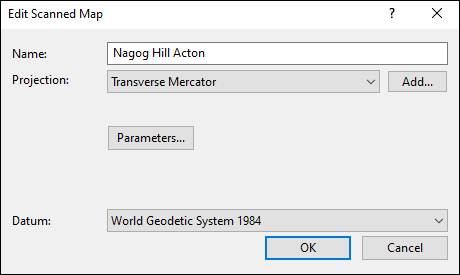
- Name
- Enter a name for this map.
- Projection
-
Select the projection that this map uses. This information should be printed on the margin of the map.
If no projection is printed on your map, and your map only covers a small area (a few square miles), you can probably get acceptable results by leaving the projection set to Mercator. - Datum
- Select the datum used on the map.
- Parameters
- If the Parameters button appears, ExpertGPS requires additional information about the map projection. Click the Parameters button and enter the projection details for the map.
Once you've named your map and selected a projection, you can skip ahead to calibrating your scanned map.
Map Projections and Parameters
In order for your scanned map to display correctly, ExpertGPS needs to know the details of the projection used when the map was printed. This information should be printed in the margin or a corner of your map.
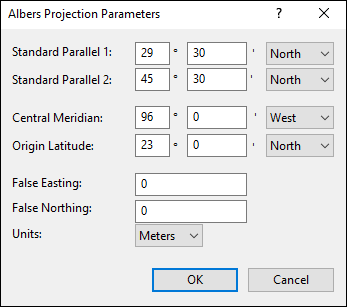
Standard Parallels
Enter the latitude of the two standard parallels, in degrees and decimal minutes.
Tips:
The standard parallels for maps showing all 50 US states are typically 20º and 60º North.
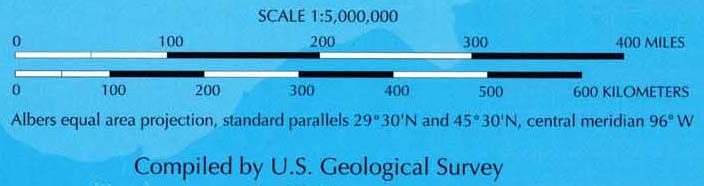
The standard parallels for maps showing the 48 conterminous US states are typically 29º 30' and 45º 30' North.
Central Meridian
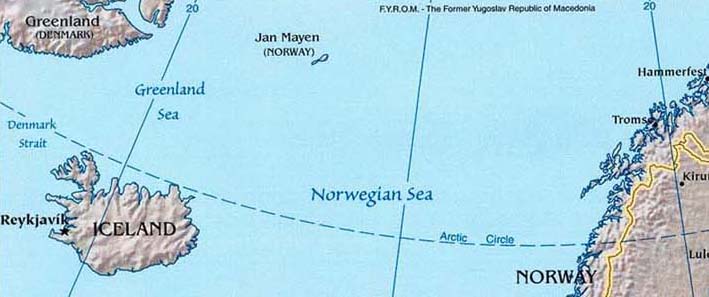
Enter the longitude of the central meridian. This is the only line of longitude on the map that is vertical. All other meridians are at an angle.
Tip:
If the Central Meridian is not explicitly listed in the map margin, determine the line of longitude that is vertical on the map.
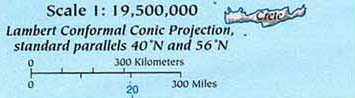
In the example below, the 0º and 20º East lines of longitude slope away from the vertical at the same angle. Therefore, the vertical Central Meridian
lies halfway between them, at 10º East.
Origin Latitude
Enter the latitude of the natural origin of the map.
False Easting
Enter the false easting used by this projection.
False Northing
Enter the false northing used by this projection.
Scale Factor
Enter the scale factor at the natural origin of the map.
Calibrating Your Scanned Map
Once you have selected a new scanned map and specified its name and projection in the Edit Scanned Map dialog, the uncalibrated map will appear in the Map window in ExpertGPS. Because the map is not yet calibrated, it will appear in the wrong location, relative to the GPS data in the file. You will now add calibration points to the map, which will "anchor" a specific landmark on the map to its correct geographic coordinates. ExpertGPS needs two calibration points to properly fit your scanned map to its correct location on the Earth.
To begin calibrating the map, do one of the following:
- On the , click .
- Press 1.
- Click the
 Calibration Point 1 button on the Map Tools toolbar.
There are three ways to create a calibration point:
- You can click on a grid line on your map to enter coordinates.
- You can Shift-click on a landmark on your map to select a matching GPS waypoint.
- You can drag waypoints, tracks, or shapes in your GPX file to their correct location on the map.
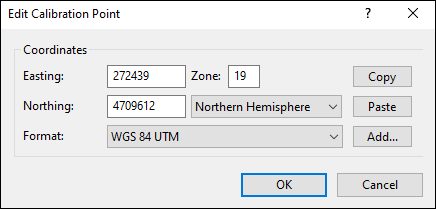
Setting a calibration point by entering coordinates
To create a calibration point at a grid line intersection, click with the Calibration Point Tool over a point on the map where you know the correct coordinates.
The Edit Calibration Point dialog will appear. Enter the coordinates, and click .
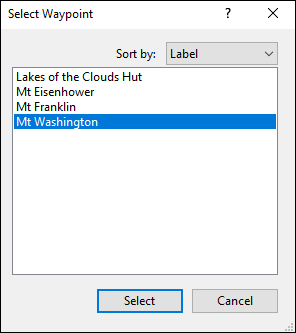
Setting a calibration point by selecting a waypoint
To use a waypoint as a calibration point, hold down the Shift key and click with the Calibration Point Tool over a feature on the map which corresponds to a waypoint in the file. (a mountain summit, the trailhead parking lot)
The Select Waypoint dialog will appear. Select the corresponding waypoint, and click .
Setting a calibration point by dragging GPS data into location
If you have GPS waypoints, a tracklog, or shape data that matches with features on the scanned map, you can drag them into position on the map. Switch to one of the Calibration Point Tools, and move the mouse over a piece of data on the map. Click and hold the mouse, and drag the data to its correct location on the scanned map.
To set the second calibration point, do one of the following:
- On the , click .
- Press 2.
- Click the
 Calibration Point 2 Tool button on the Map toolbar.
The cursor will change to ![]() . Set the second calibration point using one of the three techniques above. For best results, set the second calibration point on the opposite side of the map from where you set the first calibration point. Once you have set the second calibration point, you should see that the rest of your data now lines up nicely with features on the scanned map. You can switch between the two calibration point tools to make final adjustments to the map calibration.
. Set the second calibration point using one of the three techniques above. For best results, set the second calibration point on the opposite side of the map from where you set the first calibration point. Once you have set the second calibration point, you should see that the rest of your data now lines up nicely with features on the scanned map. You can switch between the two calibration point tools to make final adjustments to the map calibration.
When you are finished calibrating a scanned map, do one of the following:
- On the , click
 Calibrate Scanned Map.
 - Close the Scanned Map window.
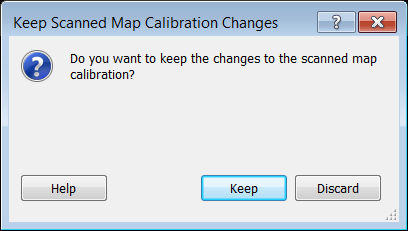
The Keep Scanned Map Calibration Changes dialog appears. If you are not satisfied with the calibration point changes you just made, you have the option to discard them.
Your scanned map is now calibrated and ready for use. The next time you want to view GPS data over this map, click on the .
© 1998-2026 TopoGrafix – 24 Kirkland Dr, Stow, MA – Email: support@expertgps.com