Add Scanned Map Command
Before you can use your map in ExpertGPS, it must be added to the Map Library and calibrated.
Adding a New Scanned Map
To add a new map to the Scanned Map Library, click on the , under .
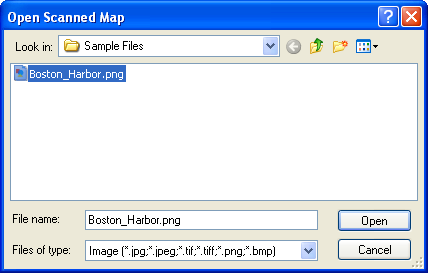
The Open Scanned Map dialog will appear. Select a JPEG, TIFF, PNG, or Bitmap image of your map.
The Edit Scanned Map Dialog
In the Edit Scanned Map dialog, enter a descriptive name for your map, and specify the projection information located on the collar of your map. If your scanned map came with a calibration file (worldfile or map calibration file), it will automatically be detected and used. Otherwise, you will need to manually calibrate the map so that your GPS data appears correctly on it.
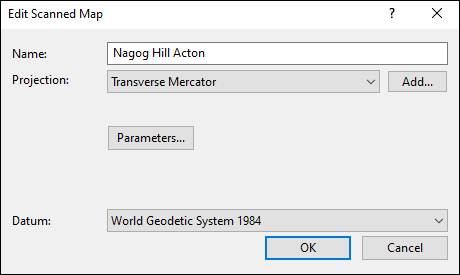
- Name
- Enter a name for this map.
- Projection
-
Select the projection that this map uses. This information should be printed on the margin of the map.
- Datum
- Select the datum used on the map.
- Parameters
- If the Parameters button appears, ExpertGPS requires additional information about the map projection. Click the Parameters button and enter the projection details for the map.
Map Projections and Parameters
In order for your scanned map to display correctly, ExpertGPS needs to know the details of the projection used when the map was printed. This information should be printed in the margin or a corner of your map.
If your map doesn't have projection information listed, and it covers a small area (like a county, town, or regional park), you can safely choose the Mercator projection and get reasonable results. It's only when you start working with maps that cover a whole country or continent that the distortion due to the Earth's curvature starts to make the exact projection details necessary.
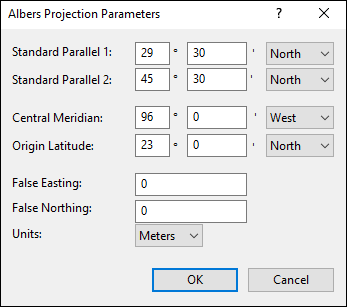
Standard Parallels
Enter the latitude of the two standard parallels, in degrees and decimal minutes.
Tips:
The standard parallels for maps showing all 50 US states are typically 20º and 60º North.
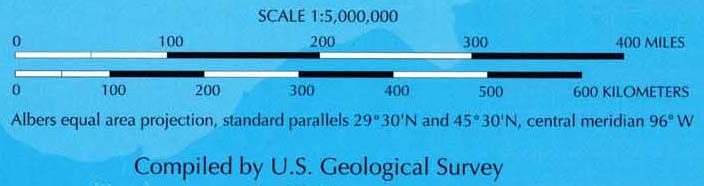
The standard parallels for maps showing the 48 conterminous US states are typically 29º 30' and 45º 30' North.
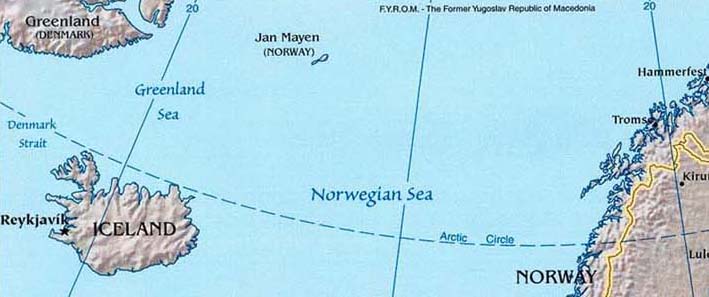
Central Meridian
Enter the longitude of the central meridian. This is the only line of longitude on the map that is vertical. All other meridians are at an angle.
Tip:
If the Central Meridian is not explicitly listed in the map margin, determine the line of longitude that is vertical on the map.
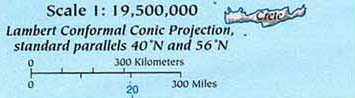
In the example below, the 0º and 20º East lines of longitude slope away from the vertical at the same angle. Therefore, the vertical Central Meridian
lies halfway between them, at 10º East.
Origin Latitude
Enter the latitude of the natural origin of the map.
False Easting
Enter the false easting used by this projection.
False Northing
Enter the false northing used by this projection.
Scale Factor
Enter the scale factor at the natural origin of the map.
© 1998-2026 TopoGrafix – 24 Kirkland Dr, Stow, MA – Email: support@expertgps.com